ET211 Correspondence
Contents
0. Overview
1. Menu
2. Toolbar
3. Entry Fields
4. Operations
5. Today's Message
6. Text Searching
7. Spell Checking
8. Any Labels
9. Mailing List
10. System Codes
0. Overview
This program puts together all letters your company has
sent and provides fast queries by dates, receiving companies, recipients or
authors.
Two document formats are available: letter
and fax. Both formats can be printed out as paper documents or transmitted to
fax machines. You can choose a font (including typeface, size and color) for the
text of a correspondence. If your computer is
connected to the Internet, correspondences can be sent as e-mails. Recipients'
information such as names, addresses, fax numbers,
e-mail addresses, etc., can be retrieved from customer and supplier files.
You can produce address labels and letters for direct
mails. Signatures and images can be appended to letters and faxes. File
attachments can be added to e-mails.
If you have Microsoft Word installed, you can perform spell checking on the
text. You can also use text words to search for
relevant correspondence.
Since you can open and save text files, this program
can function as a simplified text editor.
1. Menu
Open
- Open an External File...
Opens a text file and displays its content in Text
field.
- Save Text As...
Saves the content of the text field as a text file.
Option
- By Date
- By To Party (Addressee)
- By From Party (Author)
- By Attention
- By Reference No.
Selects the field by which data are ordered. The selection changes if you
change the data-ordered-by radio buttons in the Search for a Mail
dialog box after clicking the Search button in toolbar.
- Hide Letterhead
Hides letterheads.
- Print Fax Number
Prints fax numbers in the header section of a fax. (This would make the
number readily available when you actually need to fax the document via a
fax machine.) The default setting is not to print. Use system code
MAIL-GENRE (5th character) to override.
- Negate Find Filter
Negates the filter criteria. That is, instead of selecting, you
unselect the filtered data.
- Signature
Show Signature Block: Shows company name and horizontal bar beneath text.
Show Signature: Shows signature, if a signature image is available.
Show Authorized Signature: Shows the name in From field beneath the
bar.
- Lock Update/Delete
Set password on ET211W to enable this function.
Label
Set sizes for address labels here. Values can be
pre-defined in system
code DM-LABEL. Refer to system codes for details.
 |
| Reset parameters |
Up to 5 sets of parameters can be
pre-defined and selected. For example, select 1 for customer labels,
2 for supplier labels, 3 for customer labels with a different font,
etc. |
| Left margin |
Distance from the left edge of printable
area to the left edge of the leftest label. |
| Top margin |
Distance from the top edge of printable
area to the top edge of the first label. |
| Label width |
Horizontal distance from the left edge
of a label to that of the next label. |
| Label height |
Vertical distance from the top edge of a
label to that of a label below. |
| Label spacing |
Distance of the blank space between 2
labels. |
| Labels per column |
Number of labels per column on a page. |
| Labels per row |
Number of labels per row on a page. |
| Label Font |
To choose a font (typeface, size, color)
to print labels. |
When printing individual envelopes, set labels per row and labels per
column both to 1. Set top margin and left margin based on the
position you wish to print address. Label width and label height set the
maximum area inside of which an address can be printed. Top margin + label
height should not exceed envelope or page length. Left margin + label
height should not exceed envelope or page width.
|
Font
- Header...
A document is divided into header and text. Select font for the header here.
Font size is not effective, while color is.
- Text...
Select font typeface, size and color for text. Text in new font will be
displayed after selection. While color selection seems not effective, it
does during actual printing.

2. Toolbar
 |
To print faxes, letters, customer address labels, supplier address
labels
and any labels. See Any Labels section for details on
any labels. |
 |
Key word search. (Not
implemented yet.) |
 |
To retrieve excerpts.
 |
 |
To print direct mails to customers. |
 |
To print direct mails to suppliers. |
 |
To send e-mails. Sends a single mail or sends
to all members on a mailing list. |
 |
Text search. To retrieve correspondence that
contains matching word. |
 |
Finds the next match in a retrieved text. |
 |
Spell checking on text. |
3. Entry Fields
| Date |
Date of correspondence, an index key in data
retrieving. |
| Ref. No. |
Reference number for the correspondence.
Optional. Click the button to the right to get a
new, serialized reference number. Use system code MAIL-REFNO to set a seed
number, which must not be longer than 10 characters and must end with
digits. |
| Company |
The sender's company.
Also sets the letterhead. |
| To |
The receiving company name. This is an index key. |
| Attn |
The recipient. This is an index key. |
| Fax |
Fax number. |
| Addr |
Postal mailing address. Appears only in letter
format. |
| From |
The sender. This is an index key. |
| Title |
Title of a correspondence or subject of an e-mail. Can be used in text
retrieval. Optional. |
| E-Mail |
Internet e-mail address. |
| Text |
Text of a letter or fax. The maximum length is
about 65,000 characters. Font can be
changed in Setting->Font menu item. |
| Comments |
Comments for internal use. Will not be included in printout. |
| Key Words |
Key words for searching. Another use: Enter item numbers or image file
names (separated by commas) to print images following text. |
| Excerpt |
Provides a digest for easier reviewing. |
4. Operations
Click  or
or  in the toolbar to select a customer or a supplier. Related data for
the
recipient will be shown in the To, Attn, Fax, Address, and E-Mail fields. Choose
a suitable company in the upper-right drop down list, which will determine the
letterhead to use. After satisfactory entry, press Insert key to save
data. You can then print, fax or
e-mail the content. To print or send an existing correspondence, retrieve it
first. After you find a previous letter, you can also print or mail it.
in the toolbar to select a customer or a supplier. Related data for
the
recipient will be shown in the To, Attn, Fax, Address, and E-Mail fields. Choose
a suitable company in the upper-right drop down list, which will determine the
letterhead to use. After satisfactory entry, press Insert key to save
data. You can then print, fax or
e-mail the content. To print or send an existing correspondence, retrieve it
first. After you find a previous letter, you can also print or mail it.
in the
toolbar lets you print a letter, a fax, address labels and any labels. The
following dialog box shows if letter of fax is selected.
If you had characters of languages other than English (e.g., Chinese or Japanese),
you would need to select the right font to print correctly. Check Append Images in Key Words
to have images printed right below text. Images are specified in the Key
Words field as a string of item numbers or image file names, depending on
the state of As Item No. checkbox.
Before printing, you can select the Setting->Font menu item to change
printing font, size and color.
When printing address labels, you can select customers or suppliers in serial
(batch) or individual mode. For the former mode, provide a range and filter to
retrieve the desired customers or suppliers, as shown in the following dialog
box:
Refer to Product Data Retrieval for a detailed
description for the use of this
kind of dialog box. Show Customer No. means to print customer numbers
besides customer names. Show Contact, show phone number and show ZIP
code are all self-explanatory.
Copies for Each Customer means the copies needed for each customer.
There may be many labels on a piece of A4 paper. If you are using a paper with
some labels already used, you can print from a label other than the beginning
one by specifying the beginning row and beginning column.
For individual mode, click the Individual tab:
Enter a customer number and contact name directly or use the Browse button to
retrieve the data. Click the Add button to put the number into the list
box on the left. Continue until you are done with all customers. To
delete a customer, select the customer and click the Remove button or
double-click the customer.
To retrieve an existing correspondence, click the  button in toolbar:
The data are ordered in 5 ways (index keys). Select a key and enter a relevant
value in Key field. (For example, enter a date if Date order is
picked or enter a customer name if To party order is picked.) Clicking
the Next button will have some 50 records shown, beginning with the
specified key value. Double-click on a record to retrieve that correspondence.
To print direct mails, click in the toolbar and the following dialog box
appears:

Specify a data range and add filter if any. Click the Search button to
retrieve and put customers data in the list box. You may repeat this search
process several times for different ranges. To remove possible duplicates, click
Remove Duplicates button. To delete the whole list, click Clear
button. If
you want to add company name and signature after text, check the Signature menu
item under Setting menu.
After you saved or retrieved a correspondence, you can mail it
electronically. Making sure that you have an Internet connection, click the  button and select Send an E-mail:
The recipient, mail address, subject and sender name are all data copies from
the main window. SMTP server, domain name and sender ID are defined in system
codes MAIL-SMTP, MAIL-SITE and MAIL-ID (see below). Use
the Attachment button to add attachment files. To delete an attachment, double-click
on the file name.
The mail software your recipient uses may not be able to wrap lines. In case of
such complaints, check Use line mode
for text. The text at the recipient side will be line-wrapped as shown on
your screen.
If you are sending mails from a traditional Chinese Windows (Big5) environment
to a simplified Chinese Windows (GB) environment, select Big5->GB in
Conversion will convert the Chinese characters in text so that the sent message
will display correctly in the recipient's language. Select GB->Big5 for
opposite direction. If no Chinese characters are involved or conversion is not
necessary, select None.
5. Today's Message
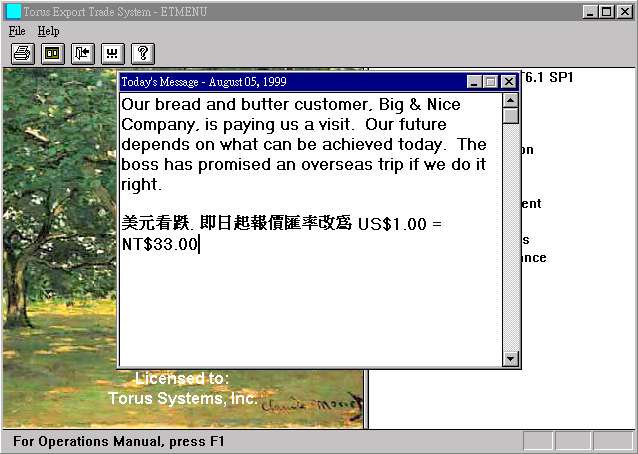
As soon as you launch ET6.1, you may see a bulletin board like the one shown above.
You can
arrange for bulletins to be displayed on set days so that users of ET6.1 will
receive specific messages on specific days.
Messages are arranged as follows: In the Correspondence
program, enter "ET61" in the To field, the appearing date in
the Date field and the message in the Text field.
You can also enter and modify today's messages in Etmenu.
6. Text Searching
You can use a string, a word or part of a word to search for text
containing matches. Click
to
enter the Text Search dialog box:
Specify a proper search range based on the selected range nature. If Match Case is not
checked, cases of words and text will not affect searching results. Otherwise,
exact matches will be used.
Click OK to start searching. Records with matching characters will be shown in
the list box of the Related Records dialog box, which overlays just below
the toolbar of the main window. The word to the right of the hyphen in the title
bar (foundation in this case) is the word used for searching. Clicking a record
would show its content in the Text field, with the first matching word
highlighted.
To locate a second matching or after, click . To
change text, select another record in the list box. To close the search session,
close the Related Records dialog box.
7. Spell Checking
If Microsoft Word was installed on your computer, you can check spelling of
text. Retrieve the text and click
on the toolbar. Checking will proceed paragraph by paragraph. A paragraph will be
skipped if no errors are found. The following dialog box appears when errors are
encountered.
Text in Not in Dictionary is a paragraph from the original text. The word
in red is where an error occurs. Suggestions contains suggested words. Click
Ignore
to ignore the current error. Click Ignore All to not check this error any longer.
If this misspelled word is actually a proper word not defined in the dictionary, you
can click Add to add it to the dictionary. The next time you do spell
checking, this word
will not be treated as an error.
Select a word from Suggestions list box and click Change to replace the
misspelled word. Click
Change All to change all occurrences of this error for the whole text. Use AutoCorrect to
create a Word AutoCorrect word table.
Spell checking requires Word automation to function. A few more seconds
are spent to load the component the first time the checking function is used.
8. Any Labels
Any labels lets you print the same content on a great number of labels. The following is
an example on a single label:
Label contents may include text, graphs and images. The syntax is the same as
that for shipping marks. To print such labels, set label size and choose font
type, style, color and size (by way of Label menu). Next, enter text along with
graph and image scripts in the Text field. The following is the script
for the above example:
<<0,0,65,15,S;27,3,35,15,O:TORUS.gif>>
Hello
After selecting Any Labels menu item, enter the copies needed:
Just enter the number of labels you need. Printing starts from the first
label at the upper-left corner. You can print
multiple labels on a page, as exemplified in the example.
9. Mailing List
Mailing list is a collection of e-mail addresses; it makes delivery of e-mails
to each member of the list an easy task. Mailing list is also the generic name
for server software that stores addresses and deliver mails. With such a server
on your mail server, you get much better performance in sending a large quantity
of mails. Currently, the adoption of mail servers is not common and mailing
lists may not be financially and operationally justified. Besides, most mailing
lists cannot integrate with ET6.1 and would seem cumbersome. Here we provide a client mailing list
that is easier to use.
You can create as many mailing lists as you like, and save each list as a text file.
The following dialog box has an address list that can be saved as promote.txt using
the Save As button. In the future, if you want to send mails to people on
the list, use the Open button to open promote.txt and retrieve the
address list. By clicking OK you will send the content text on the main window to
each one on the list.
Use Delete and Add buttons to delete or add addresses.
Save lists again after modification. You can add addresses in a list
individually here. Or in the main window, key in addresses in the Text
field, one address a line. After all addresses have been keyed in, use File->Save Text As
menu item to save the content to a text file, which can be opened here. Thirdly,
the mailing list function in Customer Data
Entry can help create lists that can be used here. One good way to verify that
mails have been sent, you can append your own address to the end of each list.
The Setting tab shows fields that should already be set in Send an E-Mail.

The list box showed above can contain approximately 64,000 characters. Given an average length of
30 characters per address, one list may contain up to 2000
addresses. We have not tried to send to 2000 addresses before. Our suggestion is
not to use large lists. Furthermore, it is customary not to attach files when
dealing with mailing lists.
10. System Codes
| Code |
Field |
Example |
Explanation |
| DM-LABEL |
7 |
0,0,70,22.8,1,13,3
0,0,150,150,3,1,1 |
Address label sizes:
Left margin, top margin, width, height, spacing, rows per column, columns
per row. Maximum 5 sets. |
| MAIL-ID |
3 |
torus |
Set this and following if you want
to send e-mail through "Fax, Letter & E-Mail". |
| MAIL-SITE |
3 |
hinet.net |
The part after "@" in e-mail address. |
| MAIL-SMTP |
3 |
ms1.hinet.net |
Mail server to use. |
Last modified: July 2002