To retrieve and open an existing sales confirmation. Same as
Prints sales confirmation in one of several formats, or other useful things. Same as
ET411 Sales Confirmation
Contents
0. Overview
1. Menu
2. Toolbar
3. Fields
4. Creating an S/C
5. Modifying an S/C
7. Printing an S/C
8. eMail Sales Confirmation
9. Calculating Total Amount
An alternative name to sales confirmation is pro forma invoice. Either can be used as the title of this document.
After you have received an order from customer, you create sales confirmations to record the sales and use them to confirm acceptance of the order. Sales confirmation is the source of data for the whole export trade transactions. Purchase orders depend on it. Shipping documents depend on it. A great portion of statistical reports and control reports also depend on it. After a sales confirmation is prepared, documents such as purchase orders and shipping documents can be automatically or semi-automatically generated.
Three formats, which are standard (single shipping date), multiple shipping and categorized, are available. All formats can contain product images. The shipping marks can contain geometric drawings (e.g., triangles, diamonds, squares) as well as images (e.g., logos). (See the chapter on customer data entry for details about shipping marks.) All formats are available as Excel files, which can be sent via emails.
Two text boxes are used for product description (in the Edit Item dialog box). The left-hand one is for normal description, which is intended for customer. The right-hand one is for local description, which is intended for supplier. The sales person is responsible for both descriptions so as to avoid the possibility of misinformation. If purchase orders are later prepared by a different person, she can still make necessary changes based on the correct descriptions passed down from the sales person. An extra text box is available for the entry of wide description, which can be conveniently used for the purpose of assortments of sizes, colors, patterns, etc. This box uses a fixed-pitch font, so that its text will be vertically aligned.
File
Edit
Setting
Note: Most of the options above can be pre-set in system code SC-GENRE.
To search and retrieve
an existing S/C: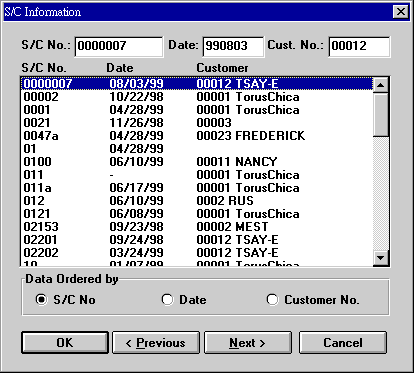 Data can be ordered according to S/C No., S/C date or customer No. + S/C No. |
|
| To print sales
confirmation in one of the following formats: Standard: one shipping date for an item. Multi-Shipping: multiple shipping dates for an item. Categorized: standard but with items grouped by categories. Local Standard: standard but with all captions and labels in traditional Chinese. Photo Sheet: images for items on a sales confirmation. Item Labels: labels showing item numbers, descriptions, packing or prices, suitable for attaching to approval samples. |
|
| Sends a sales confirmation through email to customer's email box. Customer sees the formatted content right in the viewing panel. No attachment needed. (This function is optional.) | |
To select a shipping mark after customer
number is entered and more than one shipping marks are available: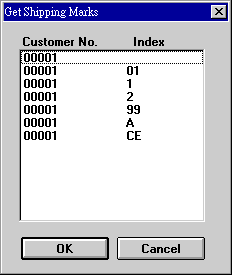 This function works only during the first time you are creating a new S/C. |
|
| Clear all fields (or return to default values). | |
Looks up the records in L/C No. field inside
payment group box.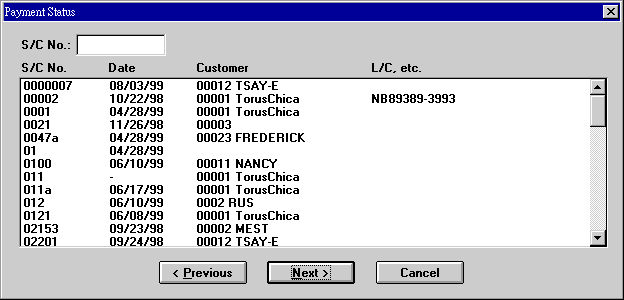 |
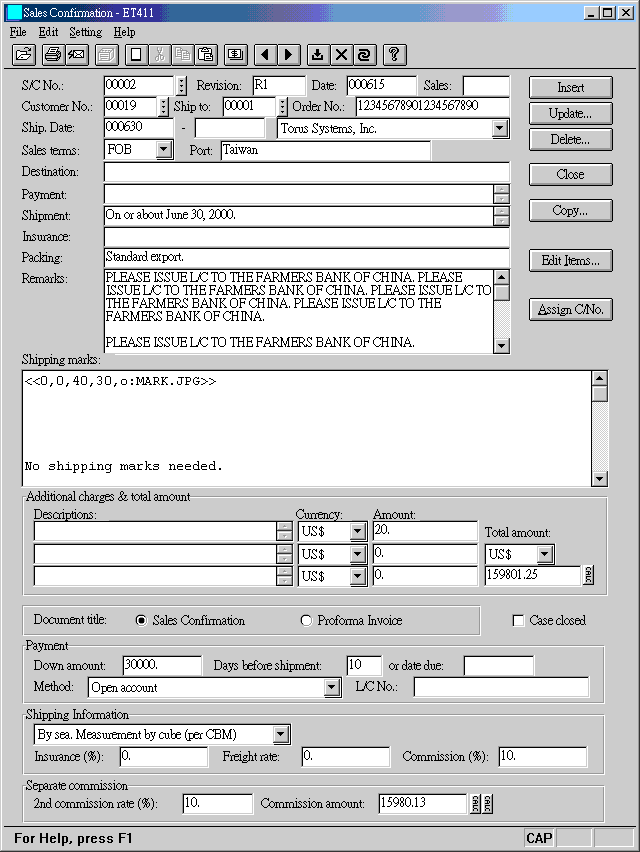
| S/C No. | Enter your S/C No. or click the neighboring button to get a automatic serial number. |
| Revision | This code has to be entered manually. It will be appended to the original S/C No. For example, if an S/C No. were SC950001 and the revision code R1, the printed S/C No. would be SC950001R1. |
| Date | S/C date. |
| Sales | Staff No. for salesperson. (Refer to Personnel File in System Maintenance for staff numbers.) |
| Customer No. | Customer number. Click |
| Ship to | Ship-to party. Optionally. |
| Order No. | Customer order number, if this number applies to all items. Otherwise, leave the field blank or use a representative number. You can assign different order numbers for individual items. |
| Ship. date | Estimated shipping date or shipping window, if such apply to all items. Otherwise, use a representative date. Different dates or windows can be assigned to individual items. |
| Company | The company that issues the S/C. Control or statistical reports use this selection to screen among companies. |
| Sales terms | If CIF or CIFC were selected, a pre-defined clause would be displayed in the insurance field. (Refer to system code TERMxx for details.) |
| Port | Port name of a sales terms, such as Taiwan in FOB Taiwan or New York in CIF New York. |
| Destination | Final destination of shipment. |
| Payment | Payment method. The value can be imported from customer data (along with shipping marks). |
| Shipment | Shipment method. The text was converted from shipping date entered previously. Modify it as you see fit. |
| Insurance | Insurance clause. A pre-defined clause was supplied when sales terms was selected. |
| Packing | Packing method. The text can be pre-defined in system code SC-PACK. |
| Remarks | Remarks. Apply <Enter> at the end of each paragraph. |
| Shipping marks | Click |
| Additional charges | Additional charges other than item amounts. Use negative values in case of deductions. The length of description is not limited. |
| Total amount | Total amount of this sales confirmation expressed in the selected currency. If multiple currencies are involved, be sure to select an overall currency. Item amounts in different currencies will be converted based on their respective exchange rates. Click CALC button to calculate total amount. |
| Document title | Use Sales Confirmation or Pro Forma Invoice for document title. |
| Case closed | Check to indicate that this sales confirmation is closed. No real usage except to gray some buttons. |
| Payment group box |
|
| Shipping information | Values of Transport, Freight rate, Insurance and Commission fields were transferred from customer data when the customer number was selected. These data are use in calculating various costs in Gross Profit Report and S/C Work Sheet on Excel. |
| Separate commission | 2nd commission rate and Commission amount relate to under-table commissions and are used for record keeping as well as query. The left CALC button calculates commission amount through total S/C amount and commission rate (a simple multiplication). The right CALC button obtains commission amount by adding up item commissions of all items. These two actions may result in different amounts. |
| Insert | You click Insert to save S/C terms data. Insertion will enable other buttons. |
| Update... | Refer to explanation about Modifying an S/C below. |
| Delete... | 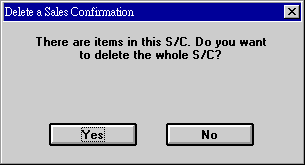 If there are items in the S/C, you will be warned. Otherwise, the S/C terms will be immediately deleted. |
| Close | Freezes the window, returning to the state when you just entered the starting screen. That is, most buttons are disabled. |
| Copy... | 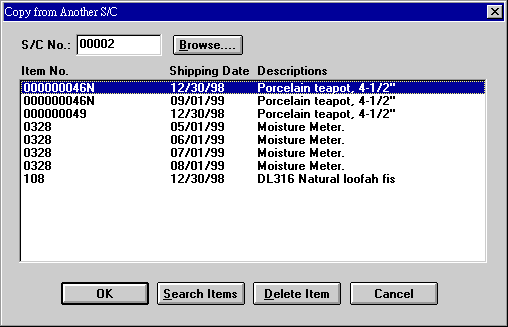 Copies items from another S/C to this newly created (and saved) S/C. Enter or look up an S/C No. and click Search Items button, to get an item list. Remove undesired items by clicking on items and pressing Delete Item button. Double-clicking will do the same trick. |
| Edit Items... | To add, modify, and delete S/C items. Details below. |
| Assign C/Nos. | 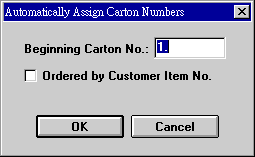 Assigns carton numbers automatically. This can only be done after all items have been entered. While editing items, you can leave carton number fields blank. By default, items are ordered by our item numbers. Ordering by customer item numbers is an option. You can specify a starting number. |
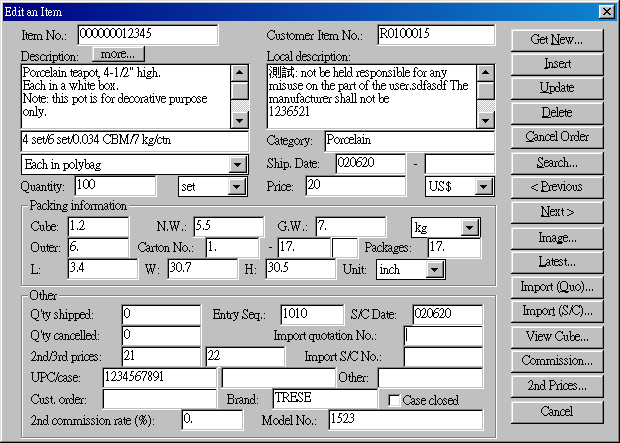
| Item No. | Our item number. | ||||||||||||||||||||||||||||
| Customer Item No. | When you get item data through Get New button, customer item number, if available, will be displayed automatically. Maybe manually entered or modified. | ||||||||||||||||||||||||||||
| Description | Normal item description. This description is shown on an S/C by default. | ||||||||||||||||||||||||||||
| Local item description is not normally printed on an S/C, but you can choose to do so. This description is by default intended for P/O. Still, P/O may opt to include normal description. The More button provides extra space for additional description (called wide description) that needs larger width to accommodate size or color assortments. During printing, wide description spans across four columns (description, quantity, price and amount), instead of the single description column. See more details in explanations for buttons below. | |||||||||||||||||||||||||||||
| Packing | Product packing. If Setting->Use CBM for Packing menu item is checked, cube will expressed in CBM. | ||||||||||||||||||||||||||||
| Packaging | Individual product packaging. | ||||||||||||||||||||||||||||
| Category | Category, used in Categorized Format where items are grouped by categories. | ||||||||||||||||||||||||||||
| Ship. date | Shipping date or window for this item. When you have more than one shipping date for an item, repeatedly press Insert button with different shipping dates. | ||||||||||||||||||||||||||||
| Quantity | Quantity of order. | ||||||||||||||||||||||||||||
| Unit | Quantity unit. | ||||||||||||||||||||||||||||
| Unit price | You can press Latest button to look up quantities and prices for recent transactions of this item. | ||||||||||||||||||||||||||||
| Currency | Price and amount currency. | ||||||||||||||||||||||||||||
| Packing information | Cube: Cube of outer (master) pack. N.W. / G.W. / Unit: Net weight, gross weight, and weight unit of outer pack. Outer: Quantity in an outer pack. Carton No.: Carton numbers and letters. Two letters are allowed, which can be used as prefix or suffix to numbers. Packages: The number of packages for this item. L, W, H, Unit: Length, width, height of an outer pack, and unit for the dimensions. |
||||||||||||||||||||||||||||
| Other |
|
| See description about Creating an S/C below. | |
| Cancel Order | 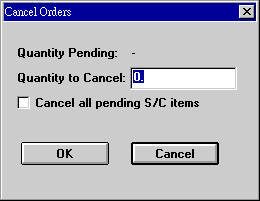 Canceling an item is different from deleting an item. When customer wants to cancel an item after a firm order, it is advisable to keep both records for acceptance and cancellation (two transactions). Delete would remove the current item from the database and you would lose track of the item having been ordered before. With Cancel, you would keep the order record and an additional record showing the cancellation transaction. You cannot cancel more than the pending quantity, but you can cancel a partial quantity. If you wanted to cancel all items with pending quantities, check Cancel all pending S/C items check box before you click OK. The latest accumulated cancelled quantity will be shown in Q'ty cancelled field. |
| Search... | 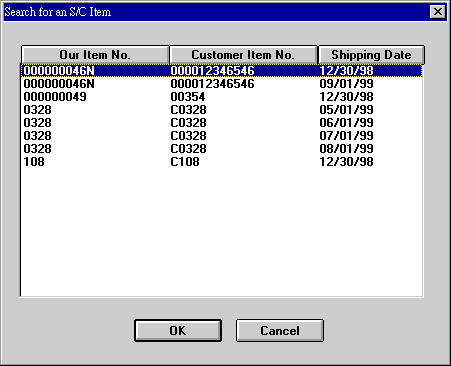 To look up the items of the currently selected S/C. |
| < Previous | Finds the previous item (after you have successfully searched an item, via Search, Previous, or Next). |
| Next > | Finds the next item (after you have successfully searched an item, via Search, Previous, or Next). |
| Image... | 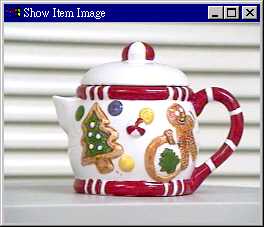 Shows the product image. |
| Latest... | 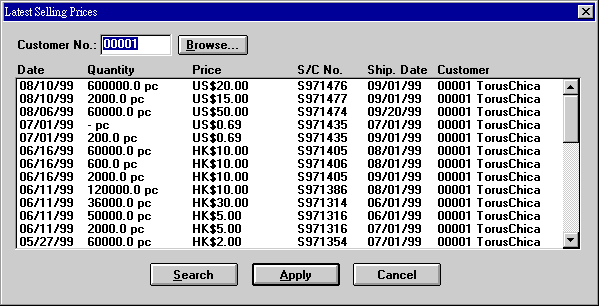 Shows the latest sales records with this customer. The dates are ordered in reverse order. To show latest sales records with all customers, blank Customer No. field and click Search button. If you wanted to use previously-used item contents instead of those from current product or customer item data, select an existing item and click Apply button. This would let you use previous data such as description, packing, price, quantity, etc. |
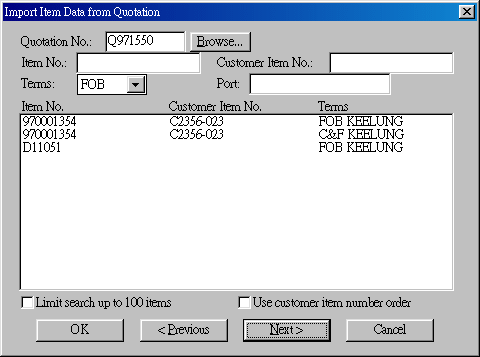 An S/C item can be copied from a quotation item, so that you can use data (description, price, packing, etc.) that are already on the quotation. Enter Quotation No. and click Next, to display items of the quotation. Select an item and click OK to import the quotation data. The limit of 100 items can be used when your quotation has hundreds or thousands of items and you do not want to waste time fetching all items. |
|
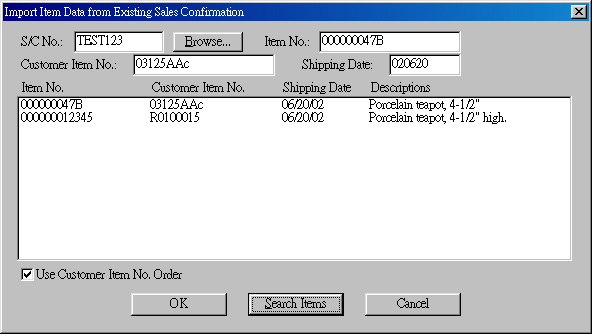 You can copy from another S/C item. Enter S/C No. and click Search Items to show items that can be copies from. |
|
| View Cube... | 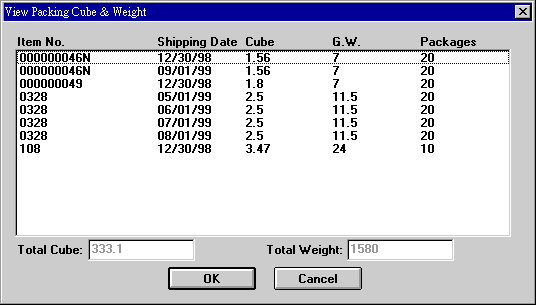 Shows individual and total cubes, weights and packages. This table is useful if you are concerned about packing sizes of orders. |
| Commission... | 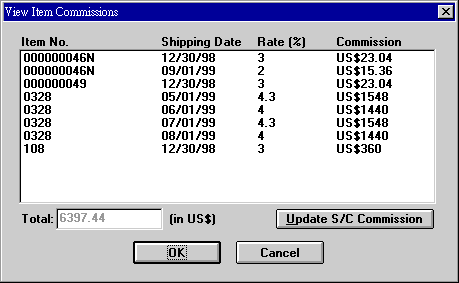 Shows individual and total commissions. Clicking Update S/C Commission button would update the Commission field in terms window by the total value shown here. |
| 2nd Prices... | 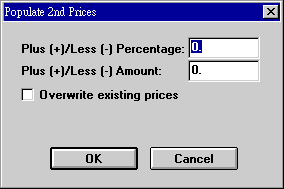 Allows you to populate the 2nd prices for all items. The new prices have a percentage variance and an amount variance from the original prices. For items that already had 2nd prices, they are retained. Checking Overwrite existing prices would cause all prices to be re-calculated. |
| more... | 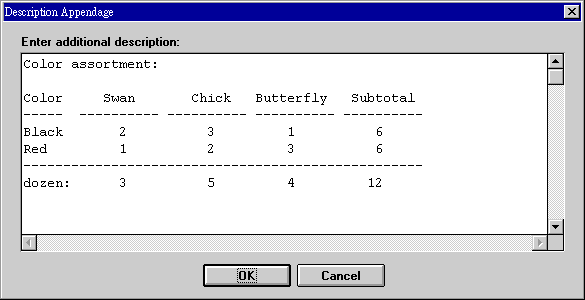 While there is no limit on the length of standard description, it is printed inside of the description column. If you need wider space for describing an item (see example above), click the more button to use the so-called wide description. The font is fixed-pitched and text is vertically aligned. |
Creating an S/C is divided into two parts: the terms window and the items window. The terms window appears first. Refer to 3. Fields above for descriptions on inserting S/C terms.
Click ![]() to
get into items window. You can get data of a
quotation item
from product or customer item (using
to
get into items window. You can get data of a
quotation item
from product or customer item (using ![]() ), from a quotation
(using
), from a quotation
(using ![]() for a previously quoted
item),
or from another S/C (using
for a previously quoted
item),
or from another S/C (using ![]() ,
mostly for re-orders).
,
mostly for re-orders).
For ![]() :
:
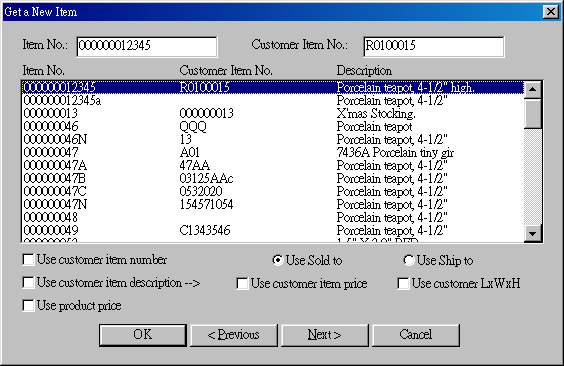
If you already knew Item No., enter it and click OK. To use customer item number, check Use customer item number before you click OK. To look up available item numbers or customer item numbers, use the Next or Previous buttons. In case of looking up customer item numbers, you have the option to choose using sold-to party or ship-to party as the customer in filtering data. Additionally, you can option to use customer item description. While this is so, you can select to use the price and/or the master pack dimensions in a customer item number record. Checking Use product price will fetch the price in product record. If nothing is specified, you will need to manually enter the price.
After an item has been retrieved, enter quantity and price, make sure all
fields are proper, and click the ![]() button to save
data. One item completed.
button to save
data. One item completed.
As for usage of ![]() and
and ![]() , refer to description
of buttons in items window above.
, refer to description
of buttons in items window above.
If an item has more than one shipping date, enter once for each shipping date. The contents may differ, but when printed in multi-shipping-date format, only the description of the first shipping date will be shown.
To modify the terms of a sale, use ![]() (open) button to retrieve the S/C. Make all necessary
changes and click Update button to finish it. When the Update button is
clicked, you will see the following dialog box:
(open) button to retrieve the S/C. Make all necessary
changes and click Update button to finish it. When the Update button is
clicked, you will see the following dialog box:
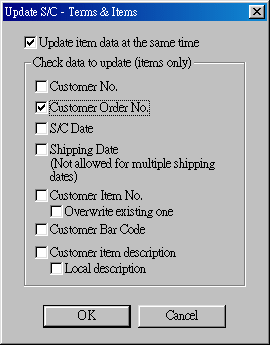
This dialog box offers you an opportunity to update related data in the S/C items at the same time. If you had changed customer number just now, you should check Customer No. here. The same reasoning applies to other check boxes. If Customer Item No. were checked, a new lookup would be performed for all items and all blank fields would be filled with newly gotten values. To overwrite even the non-blank fields, check Overwrite existing one.
To change S/C items, use ![]() to retrieve the S/C first and then click Edit
Items button. Once in the Edit
Items window, do the following:
to retrieve the S/C first and then click Edit
Items button. Once in the Edit
Items window, do the following:
To modify an existing item, use the Search button to locate the item. Make necessary changes and click Update button. Do not change values in Q'ty shipped, Q'ty cancelled and Original shipping date fields.
To add an item to an existing S/C, the procedures are the same as when you create a new S/C. To remove an item from an existing S/C, follow the steps used for modifying an item, but only to click the Delete button as the final step. Refer to buttons in items window above for more details.
Refer to description in ET412 S/C Viewing & Printing. We will eventually obsolete the printing functions in this program. All printing and viewing work will be done in ET412.
The most direct way to transmit a document to customers is to show the document right on the customer's e-mail program. Excel or Word documents require that customers have those programs installed previously. Sometimes compatibility issues would arise. Viewing attachments can be annoying or difficult, and surely is time-consuming.
eMail S/C presents a formatted document in customer's e-mail program, without
the need of other software. ![]()
eMail S/C is sent right from the program. A few system codes regarding e-mails are necessary before you can send mails. If you had used Correspondence to send mails, only the setting in the first row is needed. Otherwise, add all four system codes.
| Code | Field | Example | Explanation |
|---|---|---|---|
| IMAGE-HOST | Long name | http://www.torus.com.tw/image/ | If you want to show letterhead and images, you need a Web site to store these files. Letterhead files are named like ltrhd1.gif, ltrhd2.gif, etc. A proper width for the image is 480 pixels. The images are usually stored in the image sub-folder of the domain, but it can be any sub-folder. |
| MAIL-ID | Long name | support | Your user ID. The first part of your e-mail address. |
| MAIL-SITE | Long name | torus.com.tw | The domain name of your mail server. The second part of your e-mail address. |
| MAIL-SMTP | Long name | mail.torus.com.tw | Mail server name for the mail service you use, like msa.hinet.net, ms1.hinet.net, tpts1.seed.net.tw, and so on. |
Next, create a new folder under \torus\et61 and call it html (and we will have \torus\et61\html). This is for storing .htm files that will be generated during the sending process. These .htm files can be sent using Outlook Express in a later time.
The following dialog box starts the whole process:
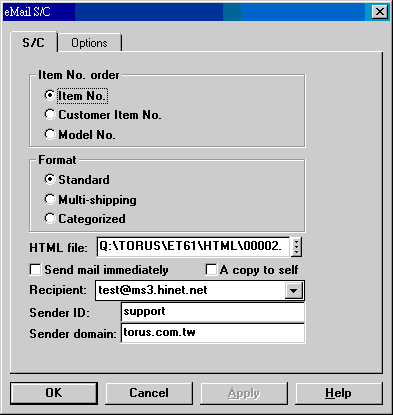
| Fields | Explanation |
|---|---|
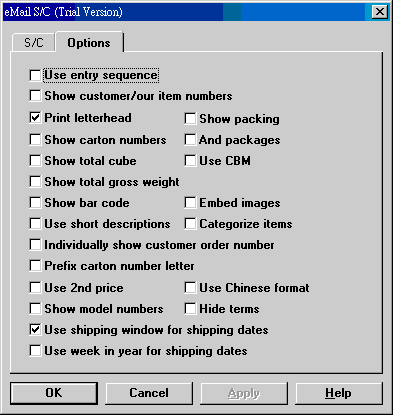
| Format | Three document formats are available. For multi-shipping format, you can choose to categorize (group) items. |
| HTML file | A file which is a concatenation of S/C No. and .htm. The folder or file name can be changed. If you sent such an .htm file through Outlook Express, you would not need a Web site for images. |
| Send mail immediately | Sends eMail S/C immediately to the recipient in the program. |
| A copy to self | Sends a copy to the sender as specified by sender ID and sender domain. |
| Recipient | The recipient list was acquired from customer data. Only one is allowed. Can be changed on site. |
If you checked Setting->Calculate Total Amount menu item, total amount for this S/C would be automatically calculated and displayed in the right field when you have completed the entries in Edit Items window. The state of the menu item can be pre-defined by the 34th character of system code SC-GENRE.
When total amount was calculated and filled in the field, the value is not saved. To save the value, click the Update button. An alert will pop up when the amount is calculated.

Last modified: October 2002